If you’re thinking about tinting your car or home windows, you’re probably stuck between two choices, doing it yourself (DIY) or hiring a professional. Both options have their appeal. DIY seems cheaper and more flexible, while professional tinting promises better results and longer-lasting quality. But which one is truly worth your time and money? This decision can impact not only how your windows look but also their durability, energy efficiency, and compliance with local tint laws. In this guide, we’ll explore every angle of DIY vs. professional window tinting, breaking down their pros, cons, costs, and performance to help you make the smartest decision.
What Window Tinting Really Means
Window tinting involves applying a thin film to glass surfaces to reduce heat, block harmful UV rays, and add privacy or style. It’s widely used in cars, homes, and offices. The film consists of layers, adhesive, tinting material, and a protective coating, that work together to manage light and heat. Depending on your needs, window tinting can help keep interiors cooler, protect furnishings from fading, and improve energy efficiency.
There are several types of window films available today, each offering unique benefits based on material and technology. Understanding these types will help you see where professional and DIY options differ most.
Common Types of Window Films
Here’s a quick overview of the most popular types of films used in both DIY kits and professional installations:
| Type of Film | Description | Key Features | Suitable For |
| Dyed Film | Uses a dye layer to absorb sunlight. | Budget-friendly, basic UV protection. | Entry-level tinting or DIY projects. |
| Metalized Film | Contains tiny metal particles to reflect heat. | Strong heat rejection, more durable. | Cars and offices in hot climates. |
| Carbon Film | Has carbon particles for superior heat and UV blocking. | No fading, high performance. | Residential and automotive use. |
| Ceramic Film | Uses advanced nano-ceramic technology. | Premium clarity, UV & IR blocking, long lifespan. | Professional-grade tinting. |
| Hybrid Film | Mix of dye and metal layers. | Balanced cost, performance, and durability. | Versatile use across vehicles and homes. |
Understanding these categories helps you decide which method, DIY or professional, can handle the type of film you want to install.
DIY Window Tinting: What It Entails
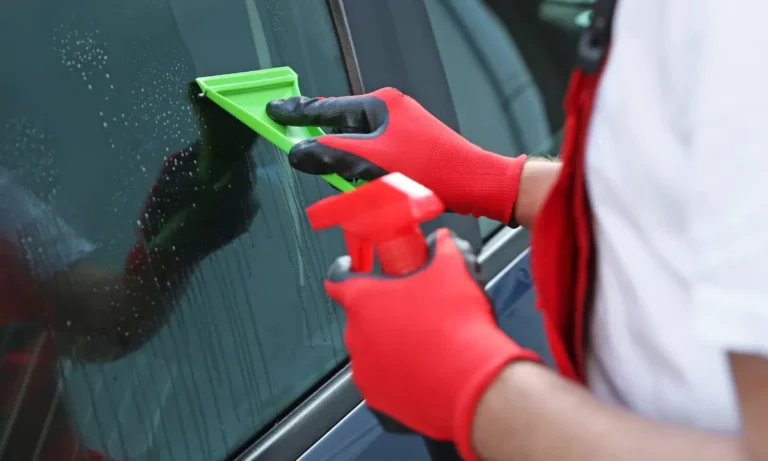
DIY window tinting involves purchasing a tint kit and applying the film yourself. It appeals to those looking to save money or enjoy a hands-on project. Most DIY kits include pre-cut films for specific window shapes, application solutions, and tools like squeegees or blades.
The basic DIY process includes
- Cleaning the surface: removing dust, grease, and fingerprints completely.
- Cutting the film: matching the exact window size and shape.
- Applying the film: using soapy water and a squeegee to avoid bubbles.
- Trimming and finishing: ensuring clean edges and smooth surfaces.
- Curing: allowing the film to set and adhere fully over a few days.
However, achieving a flawless tint isn’t as easy as it looks. Even tiny dust particles, uneven pressure, or cutting errors can cause bubbles or peeling. This is why many first-time DIY jobs need to be redone.
Tools and Materials Needed for DIY Tinting
To achieve a decent result with DIY window tinting, you’ll need the following:
- Pre-cut tint film or film roll
- Spray bottle with application solution (soapy water or tint-specific solution)
- Squeegee or credit card wrapped in microfiber cloth
- Precision knife or razor blade
- Lint-free microfiber towels
- Heat gun or hair dryer (for shaping film on curved glass)
- Masking tape and ruler for measurement
While these tools aren’t expensive, using them correctly requires steady hands, patience, and a dust-free environment. A simple mistake like leaving fingerprints under the film can ruin the finish.
Common DIY Tinting Challenges
Even experienced DIY enthusiasts often face problems during or after installation. Here are a few common issues:
- Air bubbles or blisters due to trapped air or uneven pressure
- Peeling edges caused by weak adhesion or dirty glass
- Wrinkles and creases from incorrect application angle
- Fading or discoloration if low-quality film is used
- Scratches from using harsh tools or rubbing too hard
These mistakes can compromise both appearance and effectiveness, often forcing users to replace the tint sooner than expected. While DIY saves upfront costs, fixing these problems can make it more expensive in the long run.
Professional Window Tinting: What You Get When Hiring a Pro
Professional window tinting goes beyond simply applying film, it’s a process handled by trained technicians using specialized tools and high-quality materials. Experts measure each window precisely, cut the film using plotter machines, and apply it under controlled conditions to ensure perfect alignment and zero bubbles.
Most professional tinting services include:
- Consultation: Helping you select the right film type for your goals (privacy, heat reduction, UV protection, etc.).
- Precision Installation: Using specialized equipment to cut and apply films flawlessly.
- Legal Compliance: Ensuring your tint meets state or local laws regarding darkness and reflectivity.
- Warranty & Aftercare: Covering peeling, bubbling, and fading under manufacturer or installer warranties.
Professional tinting services are also equipped to handle complex glass shapes, such as curved car windows, where DIY kits often fail.
Why Professional Tinting Stands Out
Here’s what sets professional tinting apart from DIY installations:
- Advanced tools: Heat shrink guns, high-grade squeegees, and computer-cut templates ensure smooth results.
- Certified materials: Professional-grade films often include UV rejection rates above 99% and heat reduction up to 80%.
- Warranty coverage: Many installers offer 5-year to lifetime warranties.
- Consistency: Every window matches perfectly in tone and finish.
- Safety: Professionals understand how to apply tint without damaging defroster lines, window seals, or sensors.
In short, while professional tinting costs more upfront, it delivers higher quality, better durability, and peace of mind through proper installation and legal compliance.
The Science Behind Tint Durability
A crucial difference between DIY and professional tinting lies in film bonding and curing. Professionals use heat-forming techniques that fuse the adhesive layer tightly to the glass. This enhances lifespan and prevents bubbling or peeling under extreme heat. DIY films, on the other hand, rely on air-drying which can lead to weak adhesion, especially in humid or dusty environments.
Furthermore, professional-grade films use UV-stabilized adhesives that resist fading and discoloration, while most DIY films use cheaper materials that degrade faster under sunlight.
COMPARING DIY VS PROFESSIONAL WINDOW TINTING
Choosing between DIY and professional window tinting depends on your priorities, cost, time, skill, and long-term value. While both can improve comfort, reduce glare, and block harmful UV rays, the quality and lifespan differ significantly. Here’s a detailed breakdown to help you make a clear decision:
| Aspect | DIY Window Tinting | Professional Window Tinting |
| Cost | Low upfront cost (kits $50–$200) but higher risk of mistakes and rework. | Higher initial investment ($250–$800) but consistent results |
| Quality of Film | Usually entry-level or mid-grade films. | Premium, commercial-grade, or ceramic films |
| Installation Quality | Dependent on personal skill and environment. Bubbles and dust often remain. | Flawless, factory-level precision using heat guns and computer-cut templates |
| Durability | Average 1–3 years (depending on film type and environment). | 5–10+ years with proper maintenance. |
| Legal Compliance | Must research local tint laws manually; risk of illegal VLT (Visible Light Transmission) levels. | Installers ensure full compliance with local tinting regulations. |
| Warranty | Limited or none | Professional warranties (up to lifetime) for peeling, bubbling, or fading. |
| Time Required | Several hours to a full day for a beginner. | 1–2 hours by trained technicians |
| Tools Needed | Heat gun, squeegee, razor, spray bottle, microfiber cloths. | Specialized cutting machines, commercial heat-forming tools. |
| Best For | Simple, flat surfaces or temporary projects | Curved, large, or high-value windows (cars, offices, homes). |
From this table, it’s clear that DIY is suitable for small projects and budget-conscious users, while professional tinting is ideal for long-term quality, performance, and safety.
Cost, Value, and Long-Term ROI
A common reason people try DIY tinting is to save money. However, this saving often disappears if the tint is poorly installed or fails early. A DIY kit may cost $50–$200, but if you make a mistake and need to redo it, the expense can double.
Professional tinting, on the other hand, might cost $250–$800 for a full car or residential setup. While it seems pricier upfront, it provides value through:
- Fewer replacements: Films last 2–3 times longer.
- Energy savings: Reduces air conditioning costs by up to 30%.
- UV protection: Prevents fading of car interiors or furniture.
- Warranty coverage: Protects your investment for years.
Ultimately, professional tinting offers a better return on investment (ROI), especially when considering durability, heat resistance, and overall finish quality.
When DIY Makes Sense and When It Doesn’t
There are specific situations where DIY tinting can be practical, and others where it’s best avoided. Understanding these scenarios helps you make a smart choice:
When DIY Tinting Makes Sense:
- You’re tinting flat, simple windows (e.g., small home windows or garage glass).
- You’re on a tight budget and okay with minor imperfections.
- You enjoy hands-on projects and have patience to learn.
- You want to experiment before investing in professional tinting.
When DIY Tinting Isn’t a Good Idea:
- You need tinting for complex curved windows (like rear car windows).
- You expect a perfect, bubble-free finish.
- You require long-lasting UV or heat protection (especially ceramic or carbon films).
- You need to comply with strict tint laws (for automotive or commercial buildings).
- You want warranty-backed protection for fading or peeling.
In simple terms, DIY tinting is a short-term, low-cost solution best suited for practice or basic applications. Professional tinting ensures long-term reliability, legality, and aesthetics.
Common Mistakes in DIY Tinting (and How to Avoid Them)
DIY enthusiasts often underestimate how sensitive window film installation can be. Even small errors can ruin the appearance or performance of your tint. Here are the most frequent issues:
- Dust and debris under film: Always clean the surface multiple times with a lint-free cloth and filtered water.
- Air bubbles and creases – Use a squeegee gently from the center outward; avoid applying too much pressure at once.
- Edge peeling – Trim precisely and avoid touching edges with fingers.
- Scratches or haze – Never use sharp tools or rough cloths on the film.
- Incorrect curing – Don’t roll down car windows for 3–5 days after installation to let the film bond properly.
These mistakes can make even an expensive DIY kit look cheap. Proper preparation and patience are key if you still plan to try it yourself.
Why Professional Tinting Offers More Reliability
Professional installers use controlled environments, such as dust-free workshops and temperature-stable rooms, to ensure perfect adhesion. They also rely on precision plotters that cut the film exactly to your car or window dimensions, something DIY kits can’t match.
Moreover, pros understand how different films react to heat, humidity, and glass curvature. They know when to use heat guns, how to prevent overstretching, and how to blend film edges seamlessly.
Professionals also provide value beyond installation, they ensure legal compliance, meaning your tint won’t violate visible light transmission (VLT) limits. In many states, exceeding legal tint darkness can lead to fines or even inspection failures.
Legal and Safety Considerations
Tint laws vary from one region to another. Each state or country sets limits on how dark or reflective tint can be. DIY installers often overlook this detail, leading to illegal installations that can result in fines.
Professional tinting services stay updated on these regulations and adjust the film’s light transmission accordingly. For instance, in some U.S. states:
| Window Type | Maximum Tint Darkness (VLT %) |
| Front Side Windows | 35% |
| Rear Side Windows | 20% |
| Rear Window | 20% |
| Windshield Strip | AS-1 line or 5 inches |
In addition to compliance, professionals ensure that tinting doesn’t interfere with defrosters, antenna lines, or sensors, issues often caused by incorrect DIY applications.
The Hidden Risks of Poor Installation
A bad tint job doesn’t just look unprofessional, it can cause practical problems:
- Reduced visibility at night – especially with darker tints applied unevenly.
- Overheating or bubbling – if the adhesive fails under sunlight.
- Glass damage – from using too much heat or incorrect cutting.
- Invalidated warranty – if the tint isn’t applied by a certified installer.
These risks turn what seems like a cheap DIY project into an expensive fix later on.
Comparing Costs: DIY vs. Professional Window Tinting
Cost is often the biggest deciding factor between DIY and professional window tinting. DIY tint kits are widely available and can cost anywhere from $30 to $100, depending on the size of your vehicle and film quality. On the surface, this seems like an affordable solution for those on a budget. However, it’s important to consider the hidden costs that often come with self-installation, such as purchasing extra tools, replacing film due to mistakes, or dealing with bubbling and peeling that may lead to redoing the entire job.
In contrast, professional window tinting can cost anywhere from $200 to $600 depending on the car model, film type (ceramic, carbon, or dyed), and warranty coverage. While it’s a higher upfront investment, the professional-grade materials and guaranteed installation typically result in better long-term savings. A well-done tint job can last over 10 years without issues, while most DIY jobs last 3 to 5 years before needing replacement.
Here’s a simple cost comparison table:
| Type | Average Cost | Expected Lifespan | Quality Level | Additional Expenses |
| DIY Tint Kit | $30 – $100 | 3–5 years | Basic | Tools, replacement film |
| Professional Tint | $200 – $600 | 8–10 years | Premium | Minimal (covered by warranty) |
Warranty Coverage and Aftercare
One major benefit of choosing professional window tinting is the warranty coverage that comes with the installation. Most certified tint shops provide lifetime warranties that cover peeling, bubbling, fading, or cracking. If anything goes wrong within the warranty period, the installer will fix or replace the film at no cost.
DIY tint kits, however, rarely come with such protection. Some brands may offer limited film warranties, but since the installation isn’t done by a certified technician, the warranty usually becomes void if the film fails due to user error.
Moreover, professional installers often guide customers on proper aftercare and maintenance, ensuring the tint lasts as long as possible. This includes cleaning tips, drying periods, and advice on avoiding damage, something that DIY installers often learn the hard way.
Long-Term Value and Durability
When comparing DIY and professional tinting, the long-term value heavily favors professional installation. Even though DIY kits are cheaper, they usually don’t deliver the same clarity, UV protection, or heat rejection as high-end professional films. Premium options like ceramic or carbon films block up to 99% of UV rays and significantly reduce cabin heat, which not only improves comfort but also protects your car’s interior from fading and cracking.
Professionally installed films are applied in dust-free environments with precise cutting tools and techniques, ensuring a flawless finish that doesn’t peel or bubble. DIY installations, on the other hand, are vulnerable to imperfections, even a small speck of dust or a slight misalignment can ruin the appearance and performance of the tint.
Legal Compliance and Safety Considerations
Every state and region has specific window tint laws regulating how dark or reflective your tints can be. Professional installers are familiar with these legal limits and ensure your car remains compliant. A DIY installer may not be aware of such restrictions, which could lead to fines or the need to remove the tint.
Additionally, professional-grade tints are often safety-certified, designed to hold shattered glass together during accidents. This feature isn’t guaranteed with cheap DIY films. While DIY installations may provide privacy and glare reduction, they often fall short of these safety benefits.
Making the Right Choice: Which Is Better for You?
Choosing between DIY and professional window tinting ultimately depends on your budget, skills, and expectations.
- DIY Tinting may suit those who enjoy hands-on projects and want a budget-friendly option for temporary use. It’s ideal for learning or experimenting on older vehicles where perfection isn’t crucial.
- Professional Tinting, however, is best for car owners who value long-lasting results, warranty protection, and a flawless appearance. If you want guaranteed quality, legal compliance, and a tint that enhances both style and performance, professional service is the smarter choice.
In short, while DIY can save you some money initially, professional window tinting delivers a higher return on investment, greater protection, and long-term satisfaction.
The choice between DIY and professional window tinting comes down to what you value most, cost or quality. DIY kits may seem appealing for their affordability and accessibility, but they rarely match the precision, durability, and professional-grade finish that come from experienced technicians.
If you want your tint to last, look great, and meet legal standards, professional installation is worth every penny. A skilled installer doesn’t just apply film, they help protect your investment, your comfort, and even your safety on the road.
FAQs
1. Is DIY window tinting hard to do?
Yes, it requires patience, precision, and the right tools. Even small mistakes like dust or air bubbles can ruin the finish.
2. Can I remove and reapply DIY tint?
Technically yes, but once removed, tint film cannot be reused. You’ll need a new kit for reapplication.
3. How long does professional window tinting take?
Most professional tint jobs take 2 to 4 hours, depending on the vehicle size and number of windows.
4. What type of window film lasts the longest?
Ceramic films are the most durable and effective, offering superior UV protection and heat rejection for over a decade.
5. Will tinted windows increase my car’s resale value?
Yes, high-quality professional tinting can enhance your car’s appearance and protect its interior, often improving resale value.